
Crafting the perfect cup of coffee at home is one of life's simplest yet most satisfying pleasures. I remember my first attempts at steaming milk on the Breville Barista Express, which were nothing short of chaotic. I would stand there, staring at my jug of milk, only to end up with sad, foamy bubbles or overheated milk that tasted scorched. It felt like I would never get it right. But, I kept at it, watching tutorials, practicing every morning, and slowly my results improved. Now, I'm proud to say I can craft silky microfoam that rivals my favorite local café. If you're facing similar frustrations or just want to sharpen your steaming skills, this step-by-step guide will help you master the art of milk steaming with the Breville Barista Express.
Understanding the Breville Barista Express Steam Wand
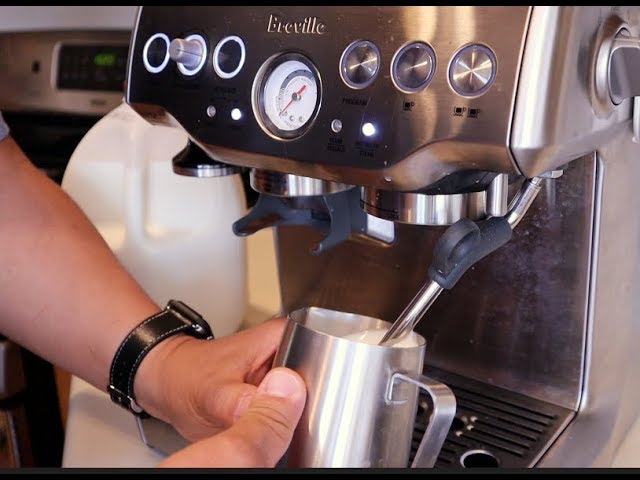
The Breville Barista Express is a fantastic home espresso machine, celebrated for its ability to make a rich espresso shot and professional-quality milk foam. At the core of its milk steaming abilities lies the steam wand, which features a 360-degree swivel that makes positioning easy.
Before you begin, make sure the machine is fully heated—this is non-negotiable. The indicator lights on the machine will let you know when it’s ready to go. In my early attempts, I often rushed this step, resulting in mediocre foam. Patience pays off, and a fully warmed machine is essential for great results.
Prepping the Milk
Choosing the right milk is crucial. Personally, I love using whole milk because of its creamy texture and ability to create rich, thick foam. Whole milk has a higher fat content, which makes it ideal for producing a luscious microfoam. If you're aiming for a lighter option, skim milk can also work well, producing a more airy but acceptable froth.
For those who prefer plant-based milk, you can still achieve great foam—you just need to be aware of the differences. Almond, soy, and oat milk all behave differently due to their unique protein and fat contents. Of these, I've found oat milk, especially the barista versions, to produce the most consistent results.
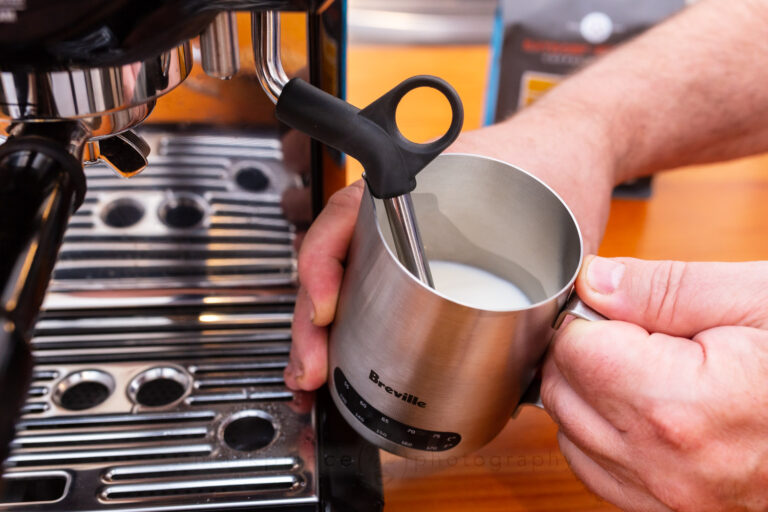
Always opt for a stainless steel milk jug. Stainless steel helps you gauge temperature by touch, and it conducts heat effectively. Fill the jug with cold milk to about one-third full, just below the spout. Cold milk is your friend—it gives you more time to stretch the milk properly before it overheats.
Steps to Steaming Milk on the Breville Barista Express
1. Purge the Steam Wand
Before you even think about putting the steam wand into the milk, turn it on briefly to purge any leftover condensation. This ensures that you’re starting with dry steam, which is crucial for creating the microfoam. I’ve made the mistake of skipping this step, and the watery steam totally ruined my texture.
2. Position the Steam Wand
Positioning is everything. Submerge the tip of the steam wand just below the surface of the milk near the jug's spout, and hold the jug at a slight angle. This position helps efficiently incorporate air while also setting up a whirlpool motion in the milk—a key component for a smooth, even texture.
3. Stretch the Milk (Create Microfoam)
Turn the steam knob to full power. You’ll hear a distinct hissing sound as air is introduced into the milk. Keep the tip just below the surface for the first few seconds to incorporate air—this is called "stretching" the milk. Be careful not to overdo it. If you introduce too much air, you’ll end up with large, frothy bubbles rather than the fine, silky microfoam you want.
4. Texture the Milk
Once you’ve incorporated enough air (usually about 3-5 seconds), raise the jug slightly so the steam wand is fully submerged. This phase is all about heating the milk while maintaining the whirlpool effect. This whirlpool breaks down any large bubbles, turning the milk into a shiny, velvety microfoam. The goal here is to achieve a texture that resembles wet paint.
5. Monitor the Temperature
Monitoring temperature is critical. Use your hand to gauge the heat by feeling the outside of the jug. When it becomes too hot to touch for more than a second (around 150°F or 65°C), it’s time to stop steaming. If you prefer precision, using a thermometer is an excellent way to make sure you don't overheat the milk. Overheating results in a burnt flavor and kills the milk’s natural sweetness—something you definitely want to avoid.
6. Shut Off the Steam
Turn off the steam knob before removing the steam wand from the milk to prevent any splatter. Carefully set the jug aside, and always remember: safety first.
Finishing Touches
Tap and Swirl
After steaming, tap the jug gently on the counter and give it a swirl. This step helps remove any large bubbles that may still be present, creating a glossy finish to the milk. When I first started steaming, I often skipped this step, and my foam wasn’t as consistent. It’s a small but crucial step to achieve a creamy, even texture.
Clean the Steam Wand
It’s vital to clean the steam wand immediately. Wipe it down with a damp cloth, and then purge it again to clear any remaining milk inside the wand. Regular cleaning prevents clogs and maintains good hygiene, ensuring that your machine continues to perform well.
Pour the Milk
For pouring, tilt your coffee cup slightly and start pouring from a higher point to mix the milk with the espresso. As you get closer to finishing, lower the jug to create latte art if you’re feeling ambitious. Creating a heart or leaf is all about steady hands and practice, but having well-textured milk is the secret to getting there.
Helpful Tips and Tricks
Practice Makes Perfect
Like any skill, steaming milk takes time to master. If your foam is too bubbly or too flat, keep practicing. Different types of milk behave differently, so don’t get discouraged if you need multiple attempts to get it right. Each mistake is a step closer to success.
Use Fresh Milk
Fresh milk is key to achieving the best foam. Milk proteins help create the microfoam structure, and fresh milk simply works better. Always check the expiration date, and avoid using milk that’s been open for too long.
Experiment with Different Milks
Not all milks are created equal when it comes to steaming. Whole milk is ideal, but plant-based options can also deliver great results. Barista-grade oat milk, in particular, tends to froth well and is great for non-dairy drinkers.
Common Mistakes to Avoid
Over-Aerating the Milk
Incorporating too much air leads to overly frothy milk that lacks the creamy consistency you’re after. Aim for a subtle hissing sound and only introduce air during the first few seconds of steaming.
Overheating the Milk
Milk starts to scald at around 170°F (77°C), which destroys its sweetness and gives it a burnt taste. Make sure to stop steaming in time to keep the milk’s natural flavors intact.
Forgetting to Purge and Clean the Steam Wand
Neglecting to purge the steam wand before and after steaming can lead to performance issues. Milk residue builds up over time and can clog the wand, diminishing its ability to produce quality steam and potentially leading to bacterial growth.
Exploring Latte Art
Once you’ve gotten comfortable with steaming milk, you may want to explore the world of latte art. Start with simple designs like a heart or a rosetta, and as you gain confidence, move to more intricate designs. Don’t be discouraged if your first attempts are a bit wobbly—even the best baristas had to start somewhere.

Conclusion
Steaming milk on the Breville Barista Express has completely transformed my home coffee routine, allowing me to craft café-quality beverages whenever I please. With patience and practice, you too can achieve perfectly textured milk that makes every latte and cappuccino an indulgence. Understanding your equipment, refining your technique, and enjoying the learning process is key to your success.
Whether you’re just looking to enjoy a perfect morning latte or are on a quest to master latte art, the satisfaction of making your own beautiful cup of coffee is second to none. So, turn on your Breville, grab your milk jug, and get steaming—your perfect cup is waiting for you!
FAQ
Q: Why is my milk always full of big bubbles?
A: Large bubbles are often a result of over-aerating the milk or positioning the steam wand too close to the surface for too long. Try submerging the steam wand slightly more and incorporate air only in the first few seconds.
Q: What type of milk is best for steaming?
A: Whole milk is generally the best for steaming due to its higher fat content, which produces a rich and creamy foam. For non-dairy options, barista-style oat milk tends to work well.
Q: How do I know when the milk is at the right temperature?
A: The easiest way is by touch—when the jug becomes too hot to hold comfortably for more than a second, the milk is at the right temperature (about 150°F or 65°C). You can also use a thermometer for precision.
Q: Why is it important to purge the steam wand?
A: Purging the steam wand before and after use ensures that any condensation or milk residue is removed. This helps maintain the quality of your steam and prevents the wand from clogging over time.
Q: Can I use plant-based milk to create latte art?
A: Yes, but results vary depending on the type of plant-based milk. Barista versions of oat or almond milk are usually the easiest to work with and can create decent microfoam, making latte art possible.